
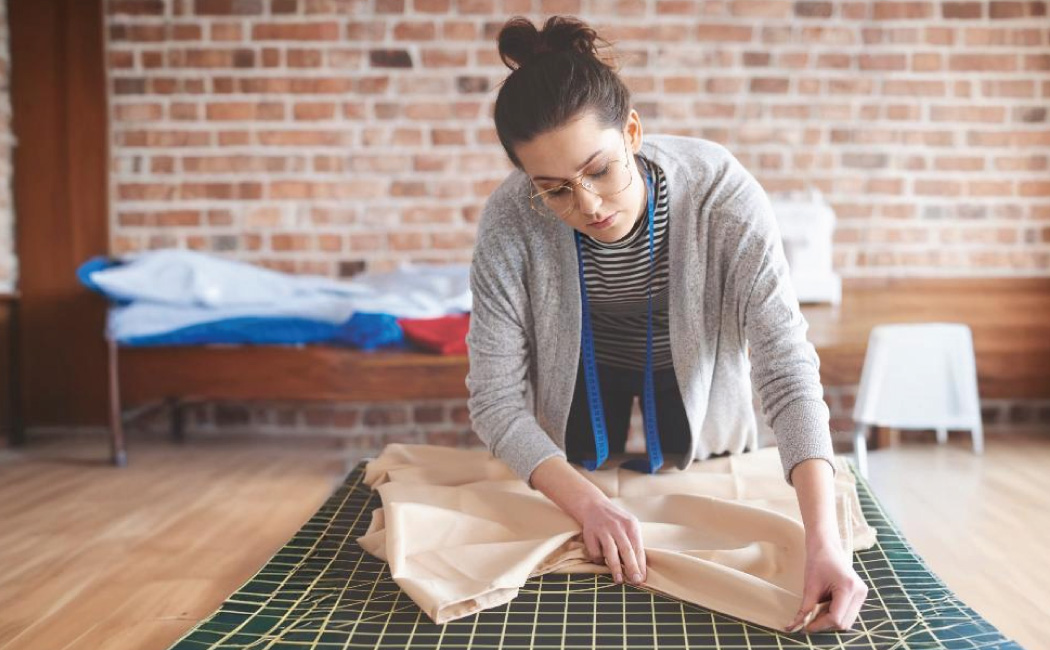
Pattern grading refers to increasing or decreasing the size of the original shape with the help of a grading sheet. It is used to make a sewing pattern smaller or bigger. It can take place by using pattern-cutting software or by hand. The outcomes of pattern grading, or these alterations, are considered the rules of pattern grading for clothes. The rules vary according to different apparel market levels and areas.
In this blog, you are going to discover how pattern grading takes place in the clothing industry. Also, the discussion will enlighten you regarding the significance, history, and different methods of pattern grading.
Origin of Pattern Grading
The introduction and mass production of commercial patterns in the 19th century became the reason for developing pattern grading. The reason was very simple: producing different sizes for different bodies became necessary. The manufacturers and designers of this era used to incorporate middle sizes like small or medium.
Pattern Grading Rules
It is very important for brands to have a perfect grading system in order to reach their desired target market. This is because appropriate grading rules define the accurate measurements of clothes.
If you are a brand, you need to grade clothes before approaching your manufacturing companies because they require the garment order and card sets of patterns to identify the perfect size for each clothing product.
Having different sizes of patterns for each clothing item can save and manage your costs of producing the minimum garments.
3 Types of Grading Patterns

The 3 types of pattern grading are:
Cut and Spread
One of the easy ways of pattern grading is to cut and spread the pieces. In order to carry out this process, cut the pattern and spread the pieces to grade them up. Or, you can grade down the pieces by overlapping them. Cut and spread requires a few easily accessible things like tape, pencils, rulers, and scissors.
Pattern Shifting
Pattern shifting refers to increasing the size of a pattern by changing its position and placing it at the same distance. Outline it again after moving if you expect the same outcomes as achieved by the cut and spread method.
Grading By Computer
Grading by computer is a technologically advanced and quickest but expensive way of grading. It gives the most accurate garment grade. You get computerized grading sheets using this method. Due to its high cost, only market giants or brands with big budgets can afford it.
However, if you need any guidance, you can get help from a high-quality clothing manufacturer with expertise in pattern grading processes and types.
Pattern Grading Techniques
Grading systems are divided into two main categories:
- Two-Dimensional Grading System
- Three-Dimensional Grading System
Two-Dimensional Grading
Two-dimensional grading is also called the track shift system. The track shift system refers to placing the base pattern pieces along the tracks to add grade increments to the separate pattern pieces. This technique is specifically used to grade a pattern for height and circumference in order for them to be applicable for loose-fit or semi-drape garments.
The best examples of such clothes are loose-fit t-shirts and blouses. This technique is very effective, but transforming it into three-dimensional grading for alterations is not possible.
Three-Dimensional Grading System
The 3-dimensional grading system is also known as the draft grade system. This technique is applicable when either a pattern is shaped back to its original form or when an increment is added to the original pattern.
This technique is used to make a pattern bigger. It is also used to make or break the suspensions in three parts generally, which are:
- From hip to waist.
- From elbow to hand.
- Shoulder to bust.
The major distinction between two-dimensional and three-dimensional grading systems is that the three-dimensional grading system is used for skin-tight or tight-fitting clothes, ranging in sizes from 10 to 22.
How to Grade Between Patterns

Expressing your style matters a lot when you live in a modern and fashionable society. One way of showcasing your fashion sense is through the perfect and precise fitting of your clothes, which comes from accurate size measurements. Here comes the need for grading between sizes. Let’s find out how you can do that.
There are four effective ways of grading between patterns:
Identifying the Measurement Accuracy
Grading between patterns requires accurate measurement. Take measurements of your hip, chest, and waist using a flexible measuring tape. Use a size chart to find the sizes that match your body and physique.
Precise measurements reduce the risk of wasting fabric and increase the probability of giving you a stunning garment product, made ideally according to your body type and shape.
Pattern Verification
Analyze the pattern you chose and observe the range of sizes carefully. Consider your body measurements according to the size chart, considering your clothing type, cut and sew manufacturer , and style preference. After the precise measurements, decide on the size or sizes to carve.
Since the whole point of grading between patterns is correct measurements, you should consider starting from the largest measurement point. For instance, create a larger size for your hips than for your waist if you have a higher hip-to-waist ratio than for your waist.
Size Comparison
If the measurements are between two sizes, the perfect technique to ensure precise fitting is sizing up or down. You can opt for two ways: either alter the pattern piece directly in case you have a PDF pattern in printed form or trace the pattern and grade it according to your desires.
Tracking Method
Initiate selecting the sizes according to the measurements of your lower and upper body. Trace and ensure that the fabric pieces lay flat onto the fabric. With the help of a ruler, draw new cutting lines that seamlessly blend the sizes. Adjust the relevant pattern pieces.
For example, front and back patterns if you are tailoring a top. The necessary step is to align the patterns properly. Make sure you double-check everything before starting the cutting process.
Effective Grading Practices to Consider
You can opt for three ways of pattern grading:
Drafting
Drafting is also called design patterns that are used to make foundational patterns. Take measurements from the body, garment, or size chart. These measurements covering the chest, hips, and waist are marked on paper. Draw the construction lines to finalize the pattern.
Draping
Draping is an expensive yet time-intensive method compared to flat pattern making. It can be done on a live model as well as a stand. The draping process is carried out by taking a two-dimensional piece of fabric and forming it across a body or dress to make a three-dimensional pattern.
Allowances are added to make clothes comfortable and roomy for easy movement. Draping helps designers see the final design effects on the garment before cutting and sewing.
Creating Flat Patterns
This process is to design perfect fit and basic patterns that are comfortable for the wearer and ideal for the body and physique. It initiates with a foundational pattern that is simple and without seam allowances or decorative aspects. It only has construction lines.
With the help of modern technology like computer-aided design (CAD), modifying the patterns into different designs becomes easy. However, creating patterns that fit well requires accurate measurements.
What Is Marker Making?
Marker making refers to a specialized stencil effective in indicating where to cut pattern pieces from various fabric layers for one or more clothing products. It is used to mark and organize the pattern pieces to overcome material waste.
This arrangement has the name “pattern yield or material utilization,” which is measured by the percentage of useable pieces of material after cutting.
Maximizing the fabric usage by arranging the pattern pieces together is called a tight marker.,” which results in a high yield.
Types of Marker Making
There are two types of marker-making:
- By hand
- By computer
Marker Making by Hand
Handmade markers are a popular method for creating markers, especially in small-scale manufacturing units. This process is carried out by a marker maker that uses a marker table to plan the layout and physical patterns. It also involves the essential elements, including length, width, placement of notches, grain direction, and other markings during the planning stage.
The two main types of marker-making by hand are:
- Full-Size Pattern-Based Marker Making
This type involves the use of full-size patterns to plan the marker layout. It is time-consuming but offers excellent accuracy.
- Miniature Marker Making
This technique involves smaller-scale patterns to plan the marker. It is faster but less precise compared to full-size marker making.
Process of Making Markers by Hand
- Take the approved sample pattern directly.
- Lay the patterns onto the fabric layers.
- Place the fabric or marker paper over it.
- Use a colored pen or a tailor’s chalk to trace the pattern.
- Finalize the marker layout.
2. Marker Making by Computer
Computerized marker-making has become a very effective and advanced technique in the garment industry. This process uses special software, which makes it accurate and fast compared to manual marker making.
The two main types of marker-making by computer are:
Automated Marker Making
The maker uses this technique to insert the parameters into the software, and the computer automatically creates the marker layout.
Interactive Marker Making
This process involves the active creation of the marker with the help of a computer. The pattern pieces are shown as miniatures at the top of the computer screen, while the centerline identifies the width of the marker. The planner organizes the pattern pieces manually to attain complete fabric utilization.
Computerized Process for Making Markers
- Initiate by approving the sample pattern pieces.
- Digitize the patterns
- Capturing the patterns with a camera or scanner.
- Insert the patterns into the clothing pattern design software.
- Use the software to organize and align pattern pieces within the marker layout.
- Finish the marker design.
Benefits and Drawbacks of Marker Making
Benefits of Marker Making
- Reduced Fabric Waste
- Improved Production Efficiency
- Enhanced Cutting Accuracy
- Versatility in Grading
Drawbacks of Marker Making
- High expenses.
- Requires high skill.
- Time-Consuming.
- Lengthy process.
- Limited Compatibility.
- Marker-making system limitations with certain fabrics.
Conclusion
Pattern grading is crucial when it comes to the pattern-making process and expecting maximum efficacy when applying the methods systematically. It helps create clothing products, accommodating a wide range of body sizes and shapes. There are certain grading ways and techniques to grade patterns.
I have covered everything you need to know about pattern grading and marker making in this blog. Give this a reading to enhance your knowledge of garments and their grading of patterns.
Read more: